HOW TO MAKE THE BEST DIY NATURAL FACE MOISTURIZER
How to make the best DIY natural face moisturizer!
Learn how to make the best DIY natural face moisturizer using simple ingredients you may already have at home.
My step-by-step guide will walk you through the entire process, from selecting the right ingredients, to storing your homemade product. Discover the benefits of natural face moisturizers and get answers to common questions.
Start pampering your skin today with my easy-to-follow tutorial!
The following post may contain affiliate links, which means I’ll get a small commission if you decide to buy using the links provided. This will add NO EXTRA COST to you but it helps me to keep this blog up and running. Thank you. You can get more info by reading my Disclaimer page.
Let’s face it: commercial moisturisers and face creams and lotions are very expensive. And, more often than not, you spend your hard earned cash on those store-bought products and they do not even deliver on their promises!
If you are tired of being victim to good marketing strategies, and are serious about looking after your skin, maybe it’s time to consider making your own DIY natural face moisturiser!
Indeed, making your own beauty products is easier than you think, and can be a great way to save money.
In this article, I will guide you through the steps to make the best DIY natural face moisturizer that will leave your skin feeling soft, smooth, and healthy.
It’s time to make your own natural face moisturizer at home!
Not only it is cheaper, but it’s also safer and healthier for your skin!
Subscribe to my YouTube Channel!
If you’d rather watch a video, you can watch on my Youtube channel!
Don’t forget to pin the post for later!
IMPORTANT
The content of this blog post is intended for information purposes only. It is not intended to replace professional medical advice.
I am not a doctor and I’m only sharing my personal experience here.
If you are unwell or sick, always ask your trusted doctor or medical practitioner for advice. Pay particular attention if you are allergic or intolerant to any food and/or medication, if you are pregnant or breast-feeding. Children and elderly people should also seek medical attention quickly if unwell or experiencing any symptom.
Even if you don’t experience any symptom, always contact your trusted health provider if in doubt. If you feel unwell and are worried, it is safer to ask for medical advice from a professional than to wait.
Always keep essential oils out of reach of children.
Never risk it!
IMPORTANT
Always follow the advice of your trusted health practitioner before using any product around your home.
Although the natural ingredients used in the recipes below are generally safe, always consult with your doctor before using any product. Pay particular attention if you suffer from any condition, allergy or if you are pregnant or breastfeeding.
Seek immediate advice and help from your trusted medical care provider if you are concerned about your health or that of your family members or pets.
For example
While essential oils and natural ingredients are generally safe for pets, some animals might be sensitive to some ingredients, or might develop an allergic reaction. Immediately stop any treatment if you notice any reaction, such as a skin irritation on your dog. Seek immediate help from your local vet if you are concerned about your pet’s health at any stage.
The same advice applies to you and the rest of your family.
Why Use DIY Natural Face Moisturizer?
Naturally, with so many options in your local store, you might wonder why should you invest time and resources in making your own DIY beauty products, when you can easily buy a product in person or on line.
The answer is that there are far better natural options to those commercially produced face moisturisers. Indeed, DIY natural beauty items are better for your skin and overall health, the environment, and your wallet!
Benefits of Using a Natural Face Moisturizer
Using a DIY natural face moisturizer has several benefits for your skin.
Here are a few:
- They are free from harmful chemicals and synthetic ingredients;
- Natural face moisturizers are gentle on the skin, and less likely to cause irritation or allergic reactions;
- They contain natural oils that nourish and hydrate your skin;
- Thanks to the ingredients used, they contain antioxidants and vitamins that nourish and protect the skin from damage caused by environmental factors such as UV rays and pollution;
- They are cost-effective compared to store-bought moisturizers, and can save you money in the long run;
- They allow you to customize the ingredients to suit your skin type and preferences.
The Benefits of Natural Ingredients for Your Skin
Using natural ingredients in your face moisturizer can provide numerous benefits for your skin. Unlike many commercial products that may contain synthetic ingredients and harsh chemicals, natural ingredients are often gentler and can help nourish and protect your skin. For example, natural oils like jojoba, almond, and coconut oil can help hydrate and soothe dry or irritated skin. Aloe vera and chamomile can also have a calming effect, while green tea and vitamin C can provide antioxidant protection against environmental factors.
By using natural ingredients in your DIY face moisturizer, you can feel good knowing that you’re treating your skin to wholesome, beneficial nutrients.
Understanding Your Skin Type for Best Results
Understanding your skin type is crucial when it comes to creating a DIY natural face moisturizer that provides the best results for your skin. In fact, different skin types have unique needs, and by selecting ingredients that cater to your skin’s specific needs, you can create a customized moisturizer that helps address your concerns.
For instance, those with oily skin may benefit from ingredients like witch hazel or tea tree oil that can help control excess sebum production and prevent breakouts. Likewise, those with dry skin may benefit from nourishing oils like avocado or argan oil, or shea butter, which can help hydrate and soothe dry, flaky skin. Combination skin types may benefit from ingredients like jojoba oil, rose water, and lavender oil, which can help regulate oil production while providing hydration and soothing benefits.
Lastly, if you have sensitive skin, it’s essential to choose gentle ingredients like aloe vera or chamomile that can soothe and calm irritation.
IMPORTANT!
By understanding your skin type and selecting the right ingredients, you can create a homemade face cream that not only hydrates and nourishes but also helps address your specific skin concerns. Plus, you’ll have peace of mind knowing that you’re using safe, natural ingredients that are free from harsh chemicals and synthetic additives.
Choosing the Right Ingredients for Your DIY Moisturizer
When it comes to making a homemade moisturiser, there are plenty of natural ingredients to choose from.
Let’s have a look at some of the natural ingredients you can use in a DIY natural face moisturiser, and their main benefits.
IMPORTANT
Just like with anything else, the quality of the ingredients you buy and use will make a huge difference to the final product, and its benefits for you.
Before purchasing any ingredient, do a bit of research and, if possible, choose 100% natural, organic and pure and unadulterated. Always buy ingredients of the highest quality you can afford.
JOJOBA OIL
My favorite among carrier oils!
Jojoba oil is a popular natural ingredient in many skincare products, including face moisturizers, due to its many beneficial properties for the skin.
Here are some of its properties:
- Hydrating: Jojoba oil is a lightweight, non-greasy oil that is easily absorbed by the skin, making it excellent for dry skin.
- Soothing: Jojoba oil has anti-inflammatory properties that can help soothe and calm irritated or inflamed skin, making it an ideal ingredient for those with sensitive skin.
- Regulating: Jojoba oil is similar in composition to the natural oils produced by our skin, which makes it an excellent oil for regulating oil production in oily or acne-prone skin.
- Antioxidant: Jojoba oil is rich in antioxidants, which can help protect the skin from environmental stressors like pollution, UV rays, and free radicals, which can cause damage and premature ageing.
- Non-comedogenic: Jojoba oil is non-comedogenic, which means it won’t clog pores or contribute to breakouts, making it a safe and effective ingredient for all skin types.
I absolutely love jojoba oil and I use it daily in my DIY beauty serum with essential oils!
COCONUT OIL
Oh, coconut oil is just amazing!
It’s packed full of great properties that make it a super popular ingredient in all sorts of skincare products.
Here are some of the things that make coconut oil so special:
- Moisturizing: Coconut oil is super hydrating and can really help to lock in moisture, which is why it’s a great ingredient for people with dry or flaky skin.
- Anti-inflammatory: Coconut oil is naturally anti-inflammatory, which means it can help to soothe and calm irritated skin. This makes it a popular ingredient for people with conditions like eczema or psoriasis.
- Antimicrobial: Coconut oil has antimicrobial properties, which means it can help to fight off bad bacteria and prevent infections. This makes it a great ingredient for people with acne-prone skin.
- Antioxidant: Coconut oil is rich in antioxidants, which can help to protect the skin from damage caused by free radicals. This can help to prevent premature ageing and keep your skin looking youthful and fresh.
- Non-greasy: Despite being an oil, coconut oil is actually really lightweight and non-greasy. It absorbs quickly into the skin, which means it won’t leave a greasy feeling behind.
FRACTIONATED COCONUT OIL
Although I do love to use coconut oil, when it comes to make DIY beauty products, I prefer to use fractionated coconut oil.
Fractionated coconut oil is a special type of coconut oil that’s been processed to remove some of its heavier components (in other words, the fat part!).
Here are some of the things that make fractionated coconut oil so great:
- Inexpensive: fractionated coconut oil is an inexpensive carrier oil, especially compared to a pricier jojoba oil.
- Lightweight: Fractionated coconut oil is super lightweight and non-greasy, which means it absorbs really quickly into the skin. This makes it a great ingredient for people who don’t like the feel of heavier oils.
- Long shelf life: Because it’s been processed to remove some of its components, fractionated coconut oil has a really long shelf life. This means it won’t go rancid as quickly as other oils, which is great for people who like to make their own skincare products.
- Odorless: Unlike regular coconut oil, which has a distinct scent, fractionated coconut oil is completely odorless. This means it won’t interfere with the scent of any other ingredients you might be using in your skincare products.
- Moisturizing: Like regular coconut oil, fractionated coconut oil is super moisturizing and can help to hydrate and soften the skin. This makes it a great ingredient for people with dry or flaky skin.
- Non-staining: Fractionated coconut oil won’t stain your clothes or sheets, which is great if you like to use it as a massage oil or in other types of body care products.
did you know?
Did you know that fractionated coconut oil can be used as a very effective, yet gentle make up remover? Just place a few drops of this carrier oil on a piece of cotton wool, and gently apply all over your face to remove make up.
Avoid direct contact with your eyes.
SHEA BUTTER
Shea butter is a fantastic ingredient that you can use in all sorts of skincare products.
Here are some of the reasons why:
- Nourishing: Shea butter is packed full of nutrients that are great for the skin. It contains vitamins A and E, which help to protect the skin from damage, as well as fatty acids that help to nourish and repair the skin.
- Anti-inflammatory: Shea butter has anti-inflammatory properties, which means it can help to calm down irritated or inflamed skin. This makes it a great ingredient for people with sensitive skin or conditions like eczema.
- Non-comedogenic: Shea butter is non-comedogenic, which means it won’t clog your pores or cause breakouts. This makes it a great ingredient for people with acne-prone skin.
- Versatile: Shea butter can be used in all sorts of skincare products, from body butters to lip balms to hair conditioners.
- Moisturising: Shea butter is super moisturising and will leave your skin feel soft and supple. As a result, it is a great choice for people with dry or flaky skin.
COCOA BUTTER
Another amazing ingredient!
Here are some of the reasons why I love cocoa butter:
- Moisturizing: Cocoa butter is deeply moisturizing, which makes it a great choice for people with dry or skin.
- Soothing: Cocoa butter has soothing properties that can help to calm irritated or inflamed skin. This makes it a great ingredient for people with conditions like eczema or psoriasis.
- Anti-aging: Cocoa butter is rich in antioxidants that can help to protect the skin from damage caused by free radicals. This can help to prevent signs of ageing like wrinkles and fine lines.
- Aromatic: this ingredient has a lovely chocolatey scent that can make your homemade skincare products really yummy!
- Healing: Cocoa butter has been used for centuries to heal and soothe skin. In fact, it can help to improve the appearance of scars and stretch marks.
ALOE VERA GEL
One of my absolute favourite ingredients when it comes to DIY skin care products.
Indeed, aloe vera gel is the main ingredient in my DIY night cream with essential oils.
Here are some of the amazing properties of this super versatile ingredient:
- Soothing: Aloe vera gel has a cooling and soothing effect on the skin, which makes it great for calming down irritation and redness. It’s particularly helpful for people with sensitive skin or conditions like sunburn or eczema.
- Hydrating: Aloe vera gel is incredibly hydrating and helps to lock in moisture, leaving your skin feeling soft and supple. This makes it a great ingredient for people with dry or dehydrated skin.
- Anti-inflammatory: Aloe vera gel has natural anti-inflammatory properties that can help to reduce inflammation and swelling. This makes it helpful for people with conditions like acne or rosacea.
- Healing: Aloe vera gel has been used for centuries to help heal wounds and promote healthy skin. It can help to improve the appearance of scars and blemishes.
- Anti-aging: Aloe vera gel is rich in antioxidants that can help to protect the skin from damage caused by free radicals. This can help to prevent signs of ageing like wrinkles and fine lines.
VITAMIN E OIL
Overall, vitamin E oil is an amazing ingredient that can benefit almost anyone’s skincare routine. Whether you’re looking to moisturize, nourish, or protect your skin, vitamin E oil is definitely worth considering.
Here’s why:
- Moisturizing: Vitamin E oil is incredibly moisturizing and helps to lock in hydration, leaving your skin feeling soft and supple.
- Nourishing: Vitamin E oil is packed with antioxidants and essential nutrients that can help to nourish and revitalize the skin.
- Anti-aging: Vitamin E oil is known for its anti-aging properties, as it can help to protect the skin from damage caused by free radicals and UV radiation.
- Healing: Vitamin E oil has natural healing properties that can help to promote healthy skin and reduce the appearance of scars and blemishes.
- Anti-inflammatory: Vitamin E oil has natural anti-inflammatory properties that can help to reduce inflammation and redness, making it a great ingredient for people with sensitive or irritated skin.
ESSENTIAL OILS
Ah, essential oils! Where do I even begin?
If you are not new around here, you know how much we love them in my home. Indeed, we use essential oils daily in my family, in a wide variety of ways, from making DIY beauty products, to homemade cleaning items, from cooking to outdoor care.
Essential oils are like little bottles of magic when it comes to skincare! These highly concentrated plant extracts have a range of amazing properties that can do wonders for your skin.
Here are some of their main properties:
- Aromatic: Essential oils have natural scents that can uplift your mood and promote a sense of relaxation. When added to DIY skincare products, they add a lovely aroma to your homemade concoctions.
- Anti-inflammatory: Essential oils have natural anti-inflammatory properties that can help to reduce inflammation and redness, making them great for people with sensitive or irritated skin.
- Soothing: Many essential oils have soothing properties that can provide relief from skin irritation, redness, and inflammation.
- Antimicrobial: Some essential oils possess natural antimicrobial properties, meaning they can help combat harmful bacteria and other microorganisms on the skin. This can contribute to clearer, healthier-looking skin.
- Nourishing: Essential oils are rich in vitamins, antioxidants, and fatty acids that can nourish and replenish the skin. They can help hydrate, soften, and promote a more radiant complexion.
- Balancing: Certain essential oils can help to balance the skin’s natural oil production.
- Revitalizing: Essential oils can rejuvenate the skin, improving dullness, promoting circulation, and giving your skin a healthy glow.
- Healing: Some essential oils have natural healing properties that can help to promote healthy skin and reduce the appearance of scars and blemishes.
REMEMBER!
ESSENTIAL OILS DILUTION CHART
YOU CAN GET MY FREE PRINTABLE with a safe dilution chart for essential oils here:
FREE DILUTION CHART FOR BEGINNERS ESSENTIAL OILS USERS.
important
Only use 100% unadulterated and pure essential oils, from a reputable company.
Never use essential oils topically unless properly diluted, and only use them after a patch test.
Pay particular attention if you are pregnant, breast-feeding, or on older people and young children.
Some people might develop skin irritations or adverse reactions.
Never ingest essential oils without reading the label first, as not all oils can be consumed internally.
Always talk to your trusted medical practitioner and/or certified aromatherapist before using essential oils, especially if you suffer from any allergy, intolerance, are ill or are already taking any medication.
Ingredients You’ll Need for Your DIY Moisturizer
Today I’m going to share with you my tried and tested recipe for the best DIY natural face moisturiser using a few ingredients and essential oils.
Indeed, for this recipe you will only need:
- Shea butter or cocoa butter: choose any of the 2, or a combination of both. Use what you prefer or simply what you have on hand. The recipe works anyway;
- Vitamin E oil: this ingredient is totally optional, but I highly recommend it, for its many properties. Use it in liquid form if possible;
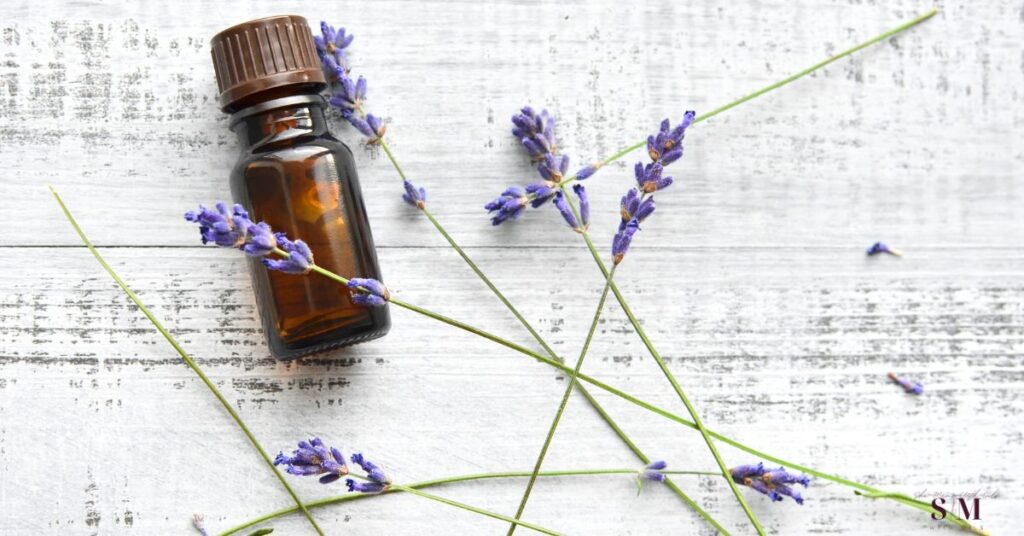
- Essential oils: there are many oils you can effectively use in homemade skincare products, depending on your taste, availability and, of course, skin type. My favourite are Lavender essential oil, Frankincense, Tea Tree, Copaiba, Yarrow Pom, Rose, Patchouli, Geranium.
- A carrier oil of choice: you can choose what you prefer or what you have already. Choose from jojoba oil, sweet almond oil, avocado oil, fractionated coconut oil, etc. My favourite, when it comes to skincare, is jojoba oil, as it works for every skin type, is non greasy and odourless.
If you need help in choosing the right carrier oil for you skin type and personal needs, I have an entire blog post dedicated exactly to that!
Here you can also download a FREE printable with all the info you need in order to choose!
Go check it!
GET THE COMPLETE BEGINNERS GUIDE TO ESSENTIAL OILS!
Are you curious about what Essential Oils are, and what they can do for you and your family?
Did you know that EO have been used for centuries to help support our health and wellbeing?
If you want to learn more, I have created the perfect complete guide to beginners EO users. You can get it on my Etsy shop at a special introductory price.
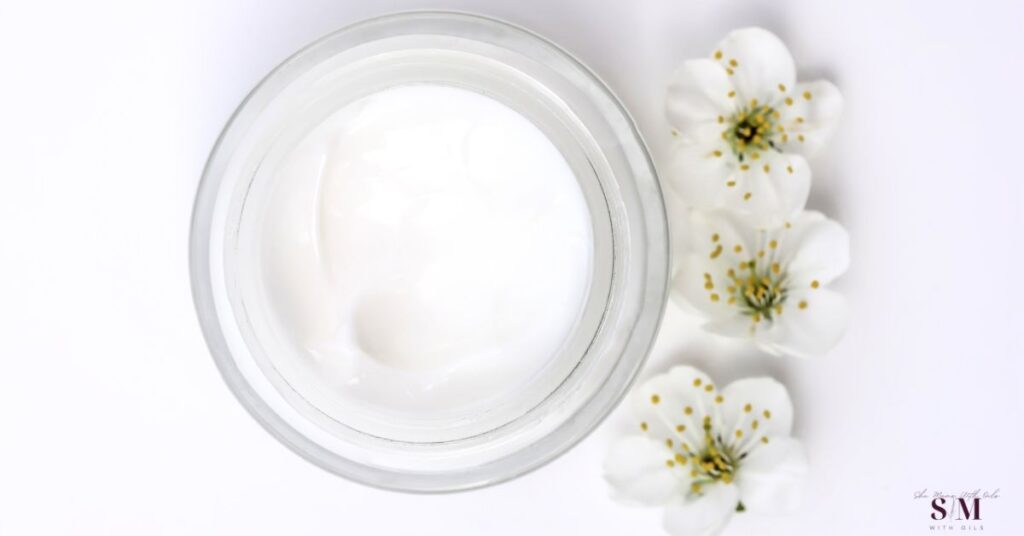
Step-by-Step Guide to Making Your Own Natural Face Moisturizer
Here is my recipe, with step-by-step instructions on how to make it, how to store it, and how to use it safely.
I hope you enjoy it.
INGREDIENTS
- 1/4 cup shea butter or cocoa butter;
- 1 TBSP of carrier il of choice;
- 1/2 tsp of Vitamin E oil;
- 10 drops of essential oils in total.
INSTRUCTIONS
In a medium sized glass bowl, add the shea butter and slowly melt over a double boiler. Once the butter has fully melted, remove from heat and add the carrier oil of your choice. Using a metal spoon, slowly stir to mix the ingredients.
Wait a few minutes until the mix has cooled down slightly, and then add the essential oils and Vitamin E oil. Mix well.
Transfer the liquid mix in dark, glass jar and let it harden completely at room temperature.
Bear in mind that, depending on the temperature in your home, this can take up to 24 hours. To speed up the process, place the jars in the fridge after about an hour.
Once the moisturiser has hardened fully, store the jars at room temperature, away from direct sunlight and heat.
Discard after 6 months max.
PRO Tip
- I prefer to make my DIY natural face moisturiser to a creamy consistency. In order to do that, simply let your liquid mix harden a bit before whipping it using a hand held blender (hand mixer). The result will be a soft and creamy homemade face moisturiser that feels light on your skin.
- Transfer to a dark glass jar and store as directed above.
Tips for Using Your Homemade Moisturiser
Here are some of my best tips for using your DIY natural face moisturizer:
- Wash your face thoroughly before applying the moisturizer. Use a gentle and natural face wash.
- Follow up with a natural toner, to get rid of stubborn impurities on your skin and to improve elasticity. Toning will improve skin tone and will prime your face for the moisturiser, making it more effective.
- Use a small amount of the moisturizer and gently massage it into your skin. Remember, a small amount goes a long way!
- Use the moisturizer in the morning. At night, you can use my homemade night cream with essential oils instead.
Tips for Storing Your Homemade Moisturiser
Just like with all DIY products made using essential oils, it is very important to store them properly, in order to use them safely without waste.
Always check if the plastic is safe to use. Alternatively, and for best results, use a dark glass jar with a tight lid. Glass is always the best option.
This particular face moisturiser doesn’t use any water among its ingredients, so it will keep for up to 6 months if stored properly.
Always keep your jars in a dark place, such as a closed cupboard or drawer, away from direct heat and sunlight. Do not leave your jars on a windowsill, or near a radiator.
Troubleshooting Common Issues with DIY Moisturizers
Although this homemade cream is very light and non comedogenic, some people might find its consistency too heavy and greasy.
If that is the case for you, you can add half a teaspoon of arrowroot powder to it.
Furthermore, if you live in a country where you experience hot temperatures, maybe this cream might be too heavy for you. I personally find this recipe very good for the winter months, when my skin is exposed to wind, rain and cold outside, and central heating and the fireplace when indoors.
My honest advice is to try it and see what you think of it, as every person is different!
Frequently Asked Questions About DIY Natural Face Moisturizers
Here are some of the most common FAQs.
What is the best carrier oil?
You can choose what you prefer or what you have already. Choose from jojoba oil, almond oil, avocado oil, fractionated coconut oil, etc. My favourite, when it comes to skincare, is jojoba oil, as it works for every skin type, is non greasy, non comedogenic, and odourless.
As a guideline, if you have:
- dry skin, use a heavier carrier oil like avocado oil or coconut oil;
- oily or combination skin, use a lighter carrier oil like jojoba oil or grapeseed oil;
- sensitive skin, use jojoba oil or fractionated coconut oil.
Can I use cocoa butter instead?
The original recipe calls for shea butter. However, you can certainly swap it for cocoa butter, or use a mix of the two together.
Will this DIY face moisturiser clog pores?
Shea butter is low on the comedogenic scale and will not clog your pores. However, every person is different, so I cannot guarantee that this recipe will work 100% for you. You might try it and see if your skin loves it.
Can I omit vitamin E oil?
You can certainly omit the vitamin E oil, although I recommend you use it. Using it will only make your DIY face cream better for your skin, adding healing and soothing benefits to it.
how to make the best diy natural face moisturiser: conclusions
Dear friend, I hope you enjoyed this post and found it useful.
Making your own DIY natural face moisturizer is a great way to take care of your skin without exposing it to harmful chemicals generally present in store-bought beauty products. By choosing the right ingredients and following a simple recipe, you can create a moisturizer that is tailored to your skin’s needs. So why not give it a try and see the amazing results for yourself?
Feel free to leave a message below and let me know if you try my recipe.
Till next time, Dee.
IMPORTANT
When using Essential Oils, make sure to use only CPTG Certified, Pure, Tested Grade ones, like Doterra Essential Oils. The content of this blog post and any information provided here has not been evaluated by the FDA (Food and Drug Administration), any government entity or medical practitioner. It is NOT intended to diagnose, treat, cure or prevent any disease, illness or condition. It is NOT intended to be a substitute for medical counselling. If you are pregnant, breastfeeding, or suffering from any medical condition or illness or injury, you SHOULD consult a qualified healthcare professional before using any product.
Hi, I’m Dee!
Mom of three; printables creator, natural solutions, simple living and homemade food enthusiast; “Outlander” fanatic.
When I’m not busy writing and designing, you can always find me covered in a cloud of flour in the kitchen, playing and crafting with my children, or making up some blends with my Essential Oils. Also I’m practically obsessed with Crystals and reading during my spare time.
Come along on our crazy journey as a family living in the countryside of Ireland!